Chris VanderWeide Chris VanderWeide

Beginner’s Guide to Vintage Reselling in an Antique Mall

Welcome to the 7-Part Series: Beginner’s Guide to Vintage Reselling in an Antique Mall

(aka everything I wish someone had handed me the day I signed my first booth contract)

Hey friend! Welcome to the exciting world of vintage reselling! If you’ve ever walked out of a thrift store with a cart full of treasures and thought, “I could totally sell this stuff and make money,” then you’re in the right place.

Operating a booth in an antique mall is one of the absolute best, lowest-risk ways to turn your love of old things into a real, profitable business—no giant storefront, no employees, no being chained to the register 60 hours a week. The mall does the heavy lifting (they stay open without you, ring up your sales, and bring in the foot traffic), and you get to do the fun parts: hunt, style, and sell.

This 7-part series is literally me dumping every single thing I’ve learned (the good, the messy, and the “why is this still in my booth after six months?”) straight into your lap. I’ve been ridiculously intentional about picking the brains of vendors who’ve been doing this for years (and sometimes decades) longer than me, and now I’m handing it all to you—no gatekeeping here.

Here’s what we’re covering over the next seven posts:

  • Part 1 – Understanding the Antique Mall Model (and why it’s perfect for beginners)

  • Part 2 – Researching your market, reading vendor contracts, and getting yourself on the waitlist without wasting time

  • Part 3 – Choosing your niche (plus the story of the mid-century bowl set I still can’t sell because I ignored my own niche—learn from my mistakes!)

  • Part 4 – Sourcing inventory like you actually want to make money, “smalls pay the rent,” price-point rules, and inventory tracking that doesn’t make you want to cry

  • Part 5 – Securing a booth, designing a display that sells (this isn’t decorating your house, y’all), and pricing so you don’t scare people (or leave money on the table)

  • Part 6 – Marketing your booth like a boss—even if you hate social media (Facebook Marketplace hacks included)

  • Part 7 – Money stuff, common challenges, time-management for real life, and how to scale when you’re finally ready to take over the world (or at least a second booth)

Many of us start this as a hobby or creative outlet, but with a little (okay, a lot) of intentionality, it can grow into something that pays off debt, funds vacations, or helps with the kids’ tuition. How big it gets is completely up to how much you’re willing to learn and actually do.

I’ve made all the rookie mistakes so you don’t have to, and I’m laying it all out—tips from my shop owners, wisdom from my fellow vendors, and every hard-knock lesson from my own booth.

So grab a coffee (or a Diet Coke—zero judgment), bookmark this page, and let’s turn your love of vintage into a business that actually makes money.

See you in Part 1!

-Chris

Read More
Chris VanderWeide Chris VanderWeide

Deciding to Open a Vintage Booth

Having a vintage booth has always been a pipe dream of mine. But I thought that’s all it would ever be. I’ve heard of how competitive it can be to get into different vintage malls and that you might be on a waitlist for a year or more. At the end of last summer, I had been thinking again about having my own booth, but I assumed it wouldn’t be so easy.

Having a vintage booth has always been a pipe dream of mine. But I thought that’s all it would ever be. I’ve heard of how competitive it can be to get into different vintage malls and that you might be on a waitlist for a year or more. At the end of last summer, I had been thinking again about having my own booth, but I assumed it wouldn’t be so easy.

I started looking into what it would take to do a vintage pop-up shop in my garage once or twice a summer. That looked daunting, and I didn’t think I could get my garage to look boutique cute because it’s primarily used as my husband’s wood shop. So I decided to look into the application process for a vintage shop near me. 

Never having had a booth before, the biggest thing I would have to do for the application was set up a mock display in my house so that they could get an idea of what my style was and what it would look like if I had a booth in their shop. That was relatively easy since we had recently bought a large hutch for our dining room, and I was using it for dishes and decor. I also had plenty of vintage items around the house to incorporate that were my own and from my vintage Etsy shop. So I set up my best display, snapped some shots, and sent in my application.

To say I was impatient was an understatement. I knew it might be months before I would hear back, but truthfully, I was more unsure that I was actually what they were looking for in a vendor. So I put my application in on a Sunday, and by Tuesday, I was emailing just asking what their process looks like after applying, and if I was what they were looking for in a vintage seller. The manager was very sweet and assured me that, yes, my style was a good fit for their shop and she intended to reach out to me that week. They had a spot opening up and planned to offer it to me. I was about to burst, I was so excited! I went in a few days later to see the available space. I paid my first month’s rent and signed a lease agreement that day. 

My lease wouldn’t start for a little over a month, so I had some time to get some furniture pieces to display my items and to bulk up my inventory. However, a little challenge was that 5 days after I was going to get my space, we would be leaving for our week-long vacation to the Grand Canyon. So that made moving in very tight. I gave myself a deadline to get fully moved in in one afternoon. With some help from my husband and some amazing friends, I was able to do it! It was pretty fun to be able to check in throughout our vacation and see people buy items throughout the week while we were gone.

One of my favorite things is the online portal that they use to give real-time updates on sales. The program is called Go Antiquing. You pay a  few dollars a month, and you get an update every evening on whether you made any sales that day. You can also log in throughout the day and see how sales are going. It’s really handy for making sure you’re staying on top of inventory in your booth. I’ve sold a few side tables and accent chairs. And to have that daily update so I can plan and get a new item in its place quickly is great.

If you’ve been considering becoming a vendor in a vintage mall, I created a FREE step-by-step guide to help you get started. It will take you from nothing to launch day. It’s the checklist I wish I had when getting started. It will take all the guesswork out of what you need to do and help you launch fully prepared. Get your free copy now.

At this point, I’ve had my booth for four months, and I’m loving it. I’ve gotten to know a few of the staff members, the owner, and the managers, and they are all so kind. You can tell they are like family and look out for each other. The other vendors are also so nice. I was so amazed by the variety of ages of everyone. Some people have been vendors at this shop for decades, and you can tell. They’ve honed in on what they sell and what their customers like. There are also vendors there who are younger and are so skilled at sourcing items that are on trend.

I’m excited to see where this leads and how this might grow for me. I’m already considering expanding and adding a second booth! But also trying not to get ahead of myself, this is only month 4 after all… Do you want to hear more about my vintage vendor journey? What I’m learning and how are sales going? Let me know.

Read More
Chris VanderWeide Chris VanderWeide

Traveling By Train to the Grand Canyon

A trip to the Grand Canyon has always been a bucket list item for my husband. But even more than him wanting to go, he wanted to experience it with all three of our girls. Since our oldest is 19 this year, we know that we are on borrowed time with how many more family vacations we will have together. So, we decided this year would be the year. We started planning about 7 months in advance with our travel agent, who was a Godsend, send I might add. I don’t think I could have pulled off a vacation like this without her. There were so many details I never would have thought about or considered. She was truly invaluable.

A trip to the Grand Canyon has always been a bucket list item for my husband. But even more than him wanting to go, he wanted to experience it with all three of our girls. Since our oldest is 19 this year, we know that we are on borrowed time with how many more family vacations we will have together. So, we decided this year would be the year. We started planning about 7 months in advance with our travel agent, who was a Godsend, send I might add. I don’t think I could have pulled off a vacation like this without her. There were so many details I never would have thought about or considered. She was truly invaluable.

During our planning process, we kept talking about the long drive from Michigan to Arizona. There was a lot of debate over how long it would take us to get there, stopping to sleep vs driving straight through. And flying wasn’t an option for us. My husband really dislikes flying, and the idea of doing that with all three girls stressed him out. But driving straight through the night without sleeping made me anxious. So, I asked our travel agent if taking the train was an option, and guess what, it was a totally feasible option. So we decided to go for it.

Along the whole trip I asked my Instagram friends if they had any questions about our trip and the train ride and so many questions came in. So I’m going to share them all here! This will be a two-part post. The first will be me sharing about our train experience, and the second will be about the vacation itself and the Grand Canyon experience. If you have any other questions, don’t hesitate to ask! Either drop your question in the comment box below or DM me over on Instagram. 

What made you choose to take the train?

We had a few factors to consider when planning this trip. The first was our budget. We weighed the cost of driving, flying, or taking the train. We added the cost of gas to drive and even consider renting a vehicle or taking our own. The cost to fly our family of 5 would have been out of our budget. When we looked into taking the train, we were surprised by how comparable the cost to taking the train vs driving.

Taking the train would mean not putting those miles on our vehicle. It also meant not worrying about having to navigate traffic or worry about directions. We would also be able to enjoy the scenery of parts of the country we’ve never experienced. Also, flying just wasn’t a realistic option for us. I don’t really love to fly, but my husband hates to fly. So, the thought of flying the whole family really caused him a lot of stress, so that was quickly dismissed. 

What was the distance you traveled, and how long did it take?

We traveled by train from Grand Rapids, Michigan, to Flagstaff, Az. That’s a distance of over 1,700 miles. Plus, then a shuttle to our hotel in Williams, Az. which was an additional 30 miles. Our total travel time one way was 40 hours. 

There was some debate about the decision to take the train vs driving, since the time to drive was a bit shorter. But we decided once we figured in the time we would lose to stop and sleep and then bathroom and gas stops we calculated the time would be comparable within a few hours.

Are you in a sleeper car?

We did not take a sleeper car. The cost of the sleeper car would have been considerably higher and out of our budget. We also would have needed to get multiple sleeper cars to fit our family of 5. We spoke to a couple who had a sleeper car that fit two people, but they spent a lot of time in the observation car because the sitting space in their sleeper car was limited. So, it may or may not be worth the cost. That being said, the sleeper car does include meals, that priced alone would have ranged from $20-$40 per person. So there is an added benefit to the sleeper car. 

Are they assigned seats?

Seats are assigned as you board the train. You don’t really have much say in where you sit. People are assigned based on where they will be getting off and how many people are in your group. Our family was always assigned in front and back or across from each other. They were always very mindful not to split up our family. You may have empty seats near you for part of the ride.

I was asked if you could move seats if there are empty seats near you. You cannot (you could ask and see where that gets you). The trains we rode both ways were fully booked. That doesn’t mean that there were people in every seat during 100% of the ride. But there were people who would be boarding throughout the ride, and they were already planning for where they would sit. As I said before, they seat you based on where you will be getting off. The staff is very mindful to make sure people don’t miss their stops, especially the people who may be getting off during the night. They want to know where you are seated so they can make sure that you are up and getting ready to get off the train at your stop and don’t miss it because you are sleeping. 

How is sleeping on the train?

First off, sleeping while traveling is never the best. Whether you are in a car, on a train, or on a plane, there is always limited space. That being said, comparing those three options, sleeping on the train was the most comfortable sleeping accommodation we have ever experienced. There was plenty of leg room and an extended footstool. The seat also reclined further than any car or plane I’ve been on, and it was also wider. 

They also lowered the lights in the train car at 10 pm, and you could close the curtains for your window, so it was nice and dark. The people on board our train were very mindful of the time and that people were sleeping. 

There were a couple of things that were challenging about sleeping, though. I mentioned that the lights dimmed at 10 pm. That was 10 pm for the current time zone. So, at that point, we had traveled through 2 time zones. So, for us, it was midnight, and we were beyond exhausted. I wish I had known this, I would have purchased eye masks for each of us so we could have gone to sleep a bit earlier.

We were also assigned seats right next to the end of the train car, and our car was next to the observation car. During the day that was great because we would walk back and forth all day, we could even see the girls if they were in the observation car without us. But at night, people would walk into the observation car and the door opening and closing was pretty loud. The ride home, we were back a few more rows, and it was much quieter. 

Did you have to get off and change trains at all?

The only time we got off the train to change trains was when we were in Chicago. We took the Pere Marquette from Grand Rapids to Chicago. The Pere Marquette is a commuter train that most people use for day or weekend trips. Once we arrived at the Chicago train station, we boarded Amtrak’s Southwest Chief. The Amtrak Southwest Chief travels cross-country, making multiple stops each day picking up and dropping people off.

The only time we got off the Amtrak between Chicago and Flagstaff was when the train stopped for extended breaks. There were a few times that the train stopped for 10 minutes or more, and you were able to get off and stretch your legs. But if you decide to do this, don’t go too far. They don’t give you much notice that the train is leaving, and they will leave without you. 

Is there food on the train?

Yes, there are a few options for eating on the train. One is the cafe car located on the lower level of the observation car. You can go down there throughout the day and purchase snacks, packaged meals, and drinks. We ate the packaged meals on our first day on the train and chose not to buy them again. They were premade, packaged foods that the cafe attendant heated in the microwave. Really just not the best for you, or very tasty.


There is a restaurant on the train where you can order a meal, and it will be cooked fresh for you. We were told by others on the train that it was very good and had a nice variety of options. We opted not to go this route just because of the cost per meal and how much it would have been to feed the whole family. Meals are a flat rate between $20-$40, depending on if it is breakfast, lunch, or dinner.


The last option is to bring your own food on the train. We brought an entire luggage of food along with us for the entire trip. We had snacks, sandwich items, meat, and cheese. We had a good variety of items and would definitely choose to do that again.

Is there WiFi on the train?

The train we took from Grand Rapids to Chicago was a commuter train. That train did have Wi-Fi available. But the Amtrak we took cross-country did not have Wi-Fi. If you have a good cell plan that might be enough Wi-Fi for what you need. If I had realized that Wi-Fi was not available on the train, I may have gone to my local library and rented a hotspot. This would have come in handy for the girls tablets and for streaming movies. If you’re doing any sort of traveling with kids, I always recommend seeing if your library rents out hotspots. They have been invaluable to us in the past. 

Tell us more about the observation car.

The observation car was probably our favorite part of the whole ride. The fact that we could get up and stretch our legs was wonderful. The observation car has windows that cover the entire wall and part of the ceiling. Getting that much sunlight was so good for our moods and didn’t make us feel like we were stuck in one place. There are options to sit at a booth-style table or in chairs that face the windows. Which is nice if you want to sit and have a meal or look out the window and sightsee. There are also lots of outlets throughout the observation car for charging your devices. 

How did you pack your whole family to travel by train?

Before our trip, we bought each of our girls their own carry-on luggage. They were absolutely ecstatic to have their very own luggage in their favorite color. We packed light, and the girls' toys, books, and a tablet all fit in their luggage along with their clothes. Each girl was responsible for their own luggage for the whole trip. They did fantastic. I wouldn’t have tried this without good quality rolling luggage, but they were each able to manage their own luggage easily.

Keith and I each had our own luggage that was medium and full size because we knew that we would end up bringing home some souvenirs. My husband has a habit of buying a sweatshirt everywhere he goes. Traveling cross-country, I had no clue how many sweatshirts we might come home with.  We also had one luggage just for food. Eating out was definitely in our vacation budget, but eating out for every meal and snack was not. Having one luggage just for food was essential and helpful. I also brought a backpack for bringing along on day trips, so we had a place for water bottles and snacks. 

In all, we each had one luggage, I had one backpack, plus one extra luggage for food. I also purchased these straps so we could attach a backpack or luggage to the handle of a luggage so we would have less to carry. They were VERY helpful throughout our whole trip. 

Would we take the train again?

Absolutely yes! If we do a short-distance trip, we will drive. But if we decided to go on another long-distance vacation trip as a whole family, this is definitely an option that we will consider again. The fact that we were able to get up and move around was very helpful. It’s hard being stuck in a car for hours at a time. Moving around and being able to transition from our seats to the observation car made this a positive experience. The seats had more room than what we have in our vehicles. Overall, taking the train was a great experience for us, and we would do it again.  

The one thing we would do differently would be to drive to Chicago and take the train from there. We had about a 3-hour layover from when we arrived in Chicago to when our next train would be leaving. We had planned to pay the fee to store our luggage for those hours a the train station and walk around the city and get lunch. Well, when we arrived, we found out that they weren’t storing luggage at the time. It was a paper form you had to fill out to do this, and they were all out of the form. It was a bit frustrating, actually. So, since we didn’t have a place to leave our luggage and didn’t want to bring it with us around the city, we just stayed in the train station for those 3 hours. That wasn’t a huge deal. 

But on the way home, we also had a 3-hour layover in the train station, and the ride home was 4 hours instead of 3, like it was on the way into Chicago. At this point in our vacation, we were just ready to be home. So, if we do it again, we will just opt to take the train out of Chicago and store our car there. 

Other random thoughts and things we learned.

The train is essentially public transportation. You will encounter all kinds of people. On our trip to AZ. everyone was pleasant, and we met some really nice people. Everyone was very courteous, and it was a great experience. With the exception of the gentleman sitting in front of me, who I’m pretty sure just loved the sound of his own voice and was a pathological liar (Maybe not actually, but he had some far-fetched stories) because he never stopped talking once someone was seated next to him.


On our way home was a bit different; we didn’t spend as much time in the observation car because there were a few men in there who were not super self-aware and didn’t care what kind of language they used or what they talked about with kids around. That was a little unfortunate. 


The bathrooms were pretty tight and only cleaned at the end of each cross-country trip. 


One thing I would bring along next time would be eye masks for sleeping for myself and the kids. Because of the time change and sun rising, I think we could have gotten a few more hours of sleep if we had eye masks and been able to cover the light. 


Phew, that was a lot. I know the train isn’t for everyone, but we looked at it as part of the whole vacation and an experience that our girls had never had before. If you have any questions about the Amtrak or traveling by train, leave a comment below. I did lots of research when planning this trip, and I found others' experiences so helpful. I’m also going to include links to items that we found helpful during this vacation below. Happy travels!


Read More
Chris VanderWeide Chris VanderWeide

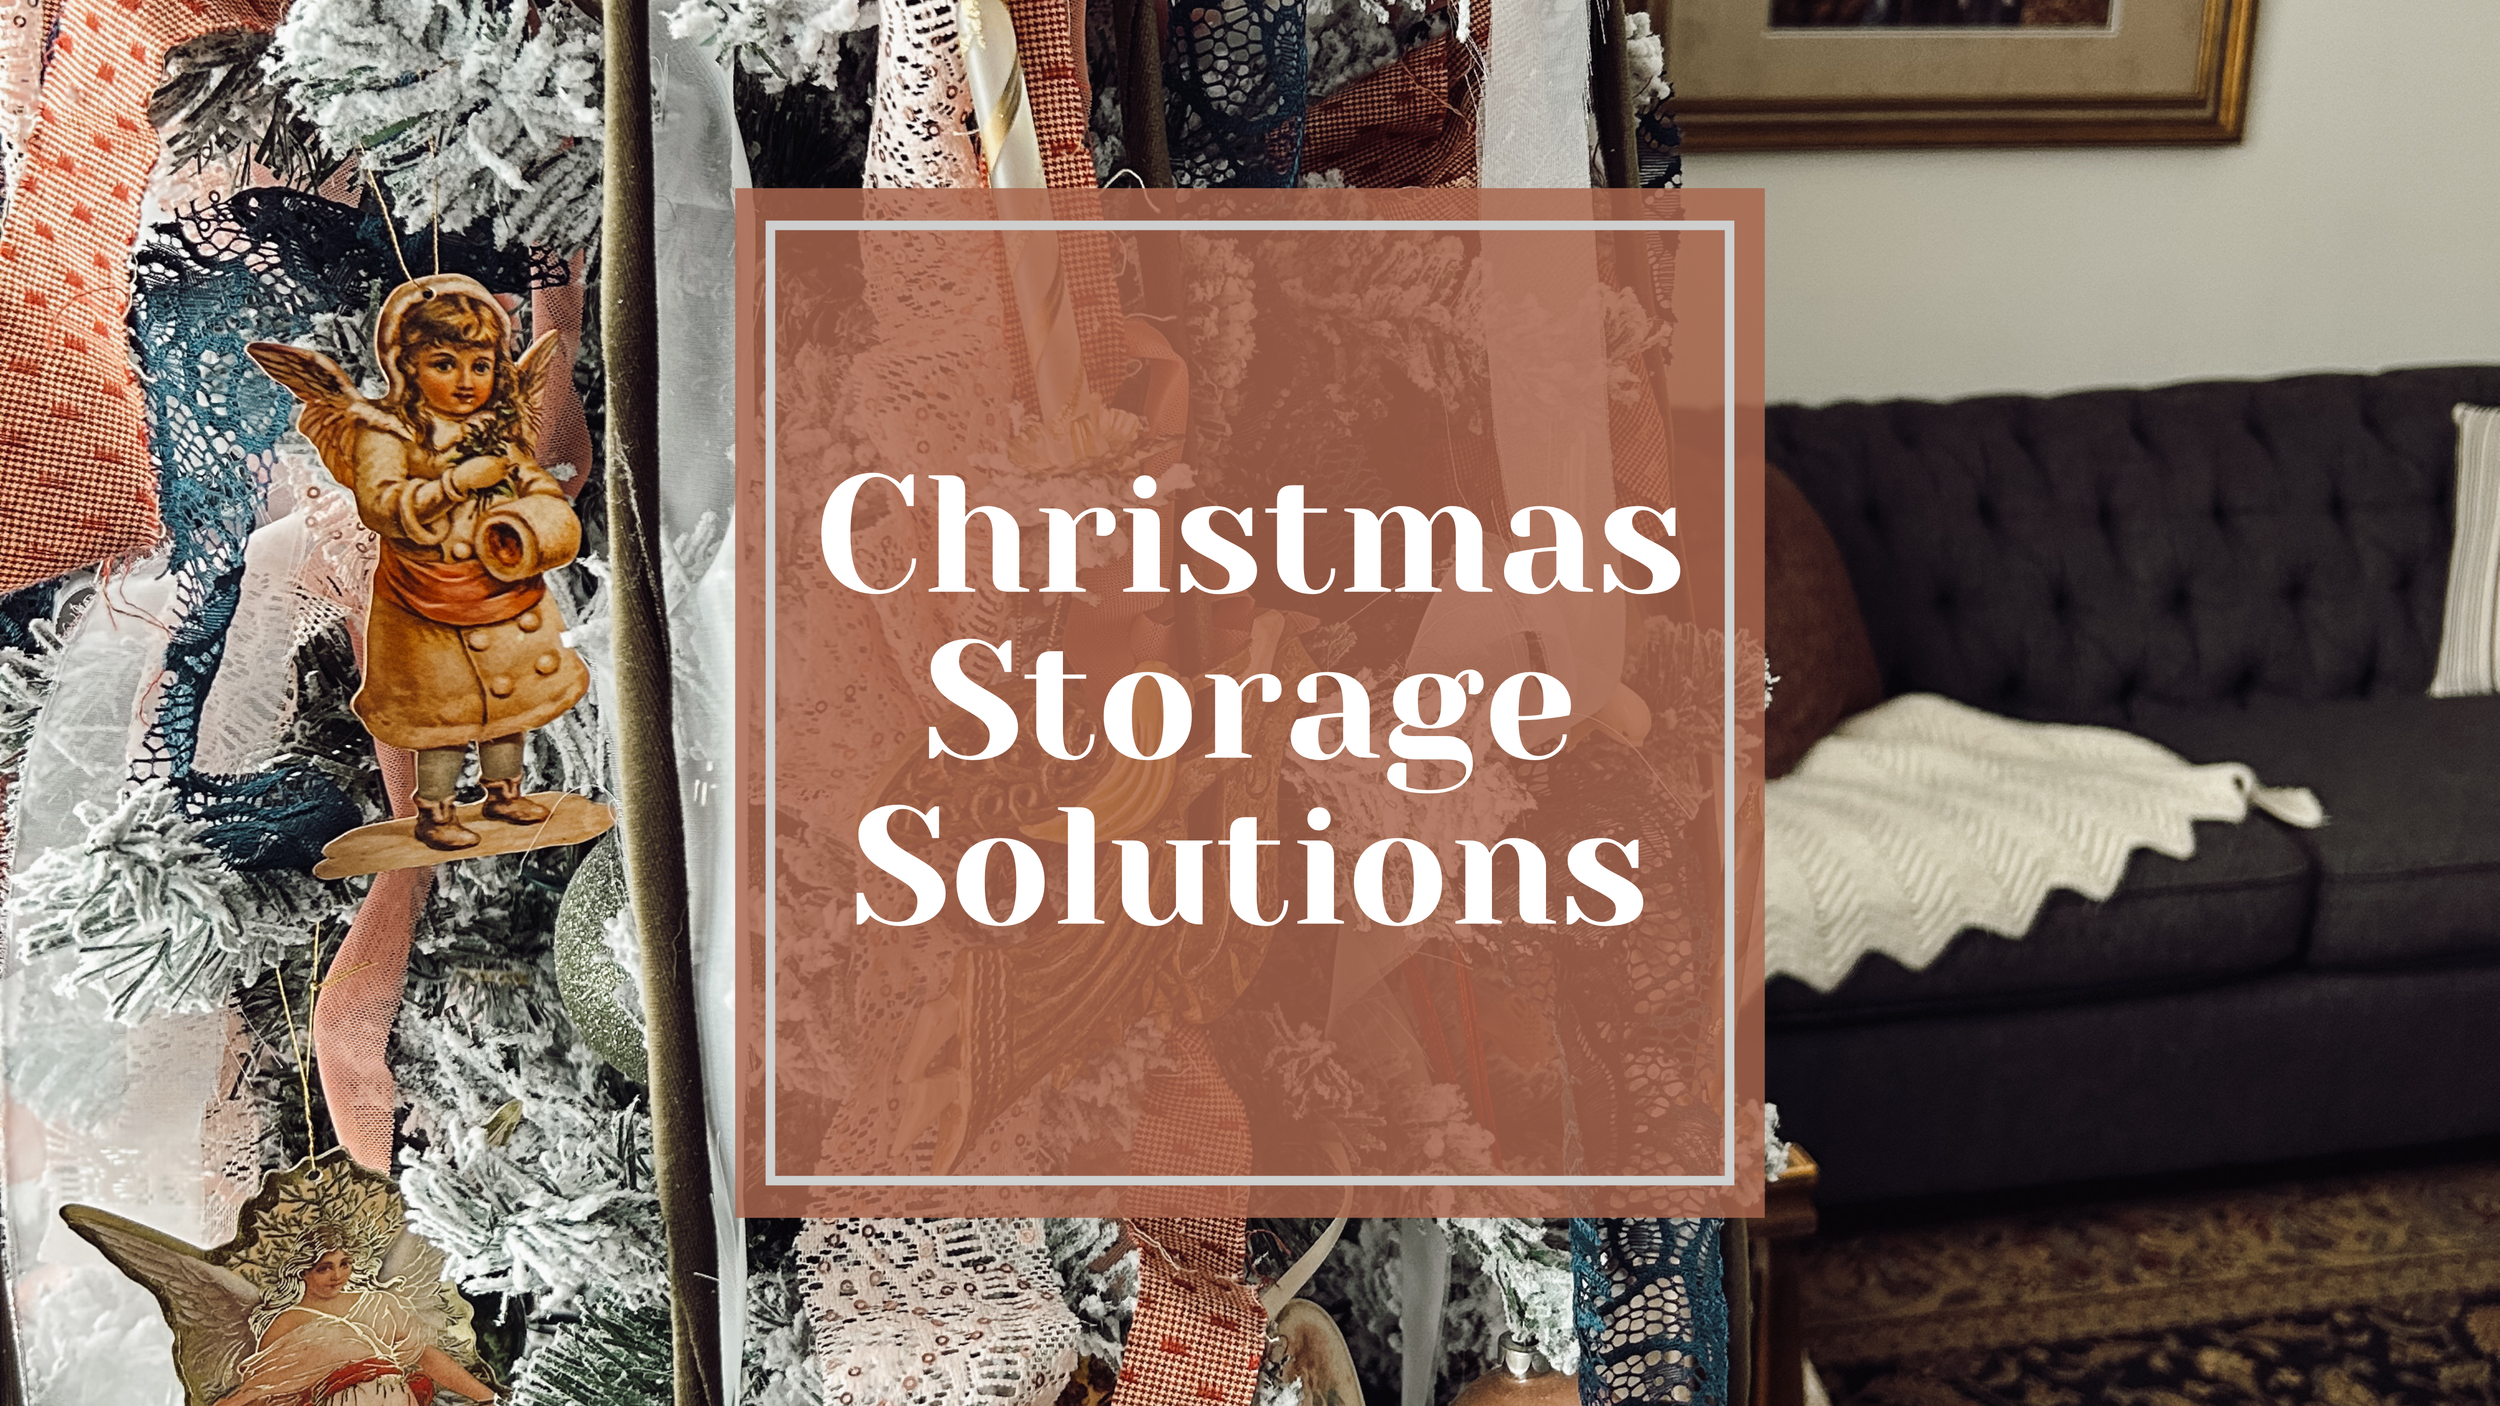
Christmas Storage Solutions

Cleaning up after the holidays always seems so overwhelming to me. Whether it’s putting away all the fall decor after Thanksgiving or packing up the Christmas tree after our last party, it always feels like a daunting task. I think what’s so stressful about the whole thing is not having a plan and knowing what to do with everything. Until last year, I was just dumping all my Christmas items in a handful of totes. The whole process was very haphazard. There was no rhyme or reason to where things went. It even made decorating for the holidays very stressful because I could never seem to find what I was looking for.

Cleaning up after the holidays always seems so overwhelming to me. Whether it’s putting away all the fall decor after Thanksgiving or packing up the Christmas tree after our last party, it always feels like a daunting task. I think what’s so stressful about the whole thing is not having a plan and knowing what to do with everything. Until last year, I was just dumping all my Christmas items in a handful of totes. The whole process was very haphazard. There was no rhyme or reason to where things went. It even made decorating for the holidays very stressful because I could never seem to find what I was looking for.

Last year, I decided it was time to put a little money into some storage solutions that would help make the whole setup and tear-down process more enjoyable. You can read more about that here, and what I decided to start off with for under $100. This year, I’m trying to fill in some gaps. I have a few larger items and ribbons that don’t fit in the totes I bought last year. I also got a great deal on some big rolls of wrapping paper. So a place to store our wrapping paper, scissors, and tape would be incredibly helpful. It might also keep the tape hidden from my kids, who always seem to steal my stash. 

I also want to give a special nod to the best storage item I bought last year. Early in the year, I scored a brand new, in-the-box flocked Christmas tree from FB Marketplace. But as soon as I set it up, I knew I wasn’t going to want to take it down and put it up year after year. That flocking was going to end up everywhere, and it was going to be a flocking mess. So I purchased a Christmas tree storage bag, and I LOVE it! It has come in handy multiple times. I keep our Christmas tree stored in our laundry room, and I’ve had to move it a few times throughout the year. The storage bag comes with a handle on the top and side, which makes it so easy to move around without worrying about smashing it, and a draw string at the bottom to hold it all together. When I opened the bag this year, I was so happy to see that very little flocking had fallen off with as how much it had been moved around. I would 10/10 recommend a storage bag if you have an artificial tree. 

Read More
Chris VanderWeide Chris VanderWeide

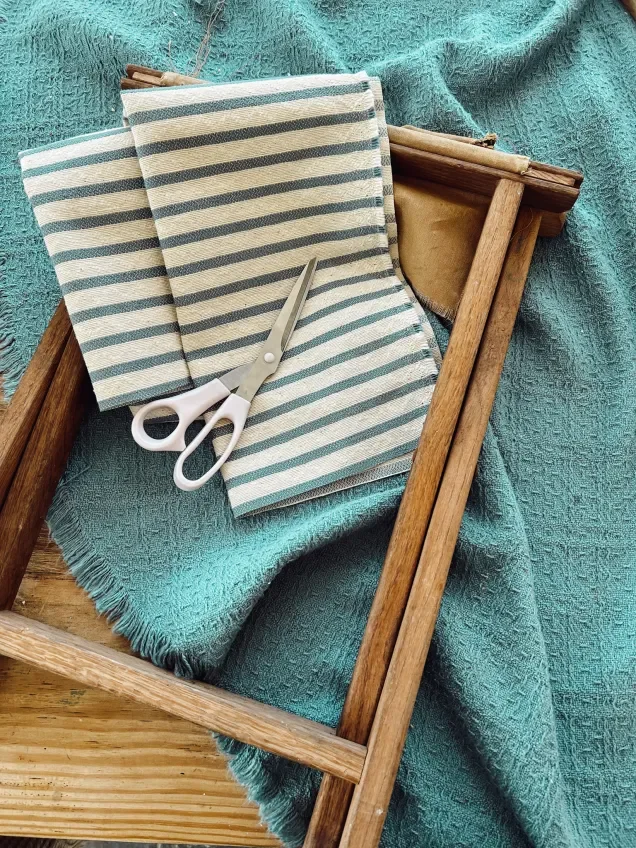
My Biggest Thrift Haul in Weeks!

I finally broke my thrifting dry spell with what has to be my biggest haul in weeks! Honestly, I went in thinking I'd just browse and walk away empty-handed, but somehow I ended up with a full wagon of gems that are perfect for the booth and Etsy. It's one of those days where you spot one little thing, like a vintage rolling pin that's solid and not some cheap reproduction, and before you know it, you're layering on vases with hand-painted details, quirky salt and pepper shakers that scream California vibes, and a gravy boat in that delicate china I can't get enough of. Come along as I talk through each piece and unpack them, from a green-handled tea kettle that feels like it belongs in a cozy kitchen to ribbed milk glass cups that would make any dessert setup feel a touch elegant. It's all about those unexpected finds that blend right into that grandmacore aesthetic I love sourcing for—practical, pretty, and ready to flip.

I finally broke my thrifting dry spell with what has to be my biggest haul in weeks! Honestly, I went in thinking I'd just browse and walk away empty-handed, but somehow I ended up with a full wagon of gems that are perfect for the booth and Etsy. It's one of those days where you spot one little thing, like a vintage rolling pin that's solid and not some cheap reproduction, and before you know it, you're layering on vases with hand-painted details, quirky salt and pepper shakers that scream California vibes, and a gravy boat in that delicate china I can't get enough of. Come along as I talk through each piece and unpack them, from a green-handled tea kettle that feels like it belongs in a cozy kitchen to ribbed milk glass cups that would make any dessert setup feel a touch elegant. It's all about those unexpected finds that blend right into that grandmacore aesthetic I love sourcing for—practical, pretty, and ready to flip.

If you're into building out your own vintage collection or just curious about how to turn thrift store runs into booth inventory without overthinking it, this one's for you; I share a few quick tips on spotting quality and why some of these older pieces hold up better than anything new. Come watch along—it's a low-key way to get inspired for your next hunt, and who knows, you might spot something that sparks an idea for your space. Head over to the video and let me know in the comments what you'd pair these with.

Read More
Chris VanderWeide Chris VanderWeide

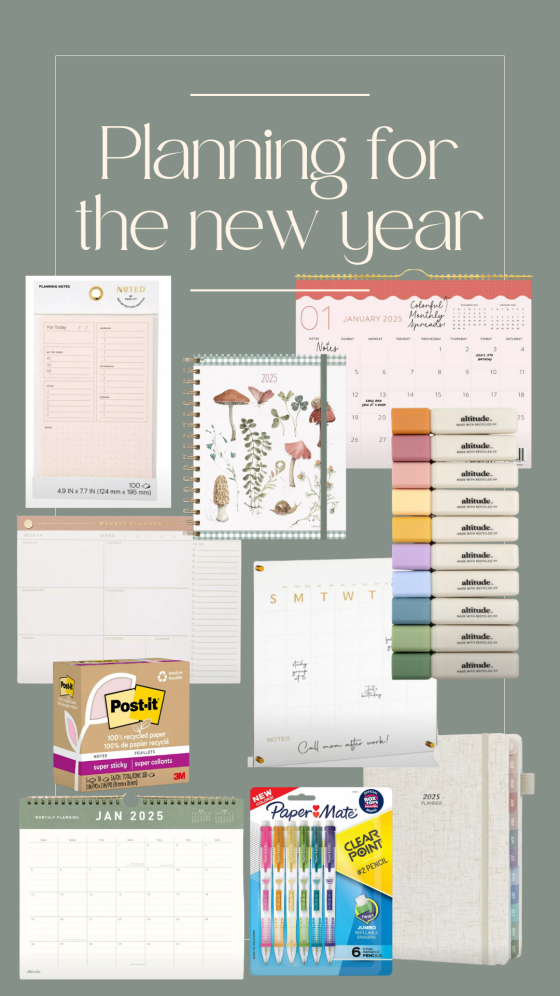
My Favorite Resources for Staying Organized in the New Year

The first of the year always feel like a great time to determine to be more productive and organized. January 1st is to adults what going back to school is to kids! All the fancy new pens, highlighters and planners. But the same way those school planners are blank and those lockers are trashed by October 1, most adults have given up on their new planning method by the first of February.

The first of the year always feels like a great time to determine to be more productive and organized. January 1st is to adults what going back to school is to kids! All the fancy new pens, highlighters, and planners. But the same way those school planners are blank, and those lockers are trashed by October 1, most adults have given up on their new planning method by the first of February.

So, before I started scrolling through Amazon looking for the cutest new planner for the year, I thought I would take a moment to think about what systems and processes I’ve put into place in the past that we’ve actually stuck with. At this point, I really don’t have any extra money to be spending on something I’m not even going to follow through with. I think most of us are feeling the need to tighten the budget after the holidays. Here are 4 different systems in my life that I’ve stuck with long-term and that work for our family to help things run more smoothly. 

A Family Planner

As much as I want to be a physical planner person, I’m just not. I don’t always have it with me when I need it, and I need an option that’s convenient and accessible. What really changed things for us was when our oldest got her first job about 4 years ago. Keeping track of my husbands, and her schedule was just becoming too much to manage. We officially became a Google Calendar family. It’s just too easy because everyone adds their own plans, and they all merge into one calendar. No more asking my husband 15 times what time he’s golfing Saturday for him to look at me with the “I already told you this” face. It took a little bit to get everyone on board, but once everyone was on board, it was a game-changer.   

A Blog/Content Planner

This is where I do use a physical planner. I’ve tried one of those other digital planners that businesses use for managing content and events, but I’m just more the type that needs to be able to see all my notes right in front of me and quickly flip back and forth. There are all sorts of planners out there, and this is the one I’ve decided to use this year. I like that there is plenty of room for writing my content ideas and tasks in the daily boxes, and I can see the whole month at a glance. It’s not uncommon for me to have to switch things around throughout the month, so seeing it all in one place is helpful. I can also fit a small sticky note in each box. So while I’m deciding what day for each content idea I can use sticky notes until I land on a plan that I think will work well for me, then I fill it in with pen or pencil. I also liked that there are two full sides of lined paper between each month. I take a lot of notes about content ideas, and this is a helpful way to keep them all in one place. 

Meal Planning and Grocery List

Raise your hand if you love to meal plan. “Chirp, Chirp.” Yeah, me neither. In 2016, a friend shared with me a meal planning service called Plan To Eat. GAME CHANGER. It’s like a digital cookbook where you can drag and drop your recipes into a calendar and plan out your week. THEN… it goes a step further and turns that meal plan into a digital grocery list for you to bring with you to the store. You can also easily add new recipes that you find online to your Plan To Eat list of recipes. The best part is the price can’t be beat, and with my referral code, you can actually get 20% off and an annual membership. 

Budgeting

Full disclosure, until a year ago, my budgeting method was hot mess express. I’m the one in our marriage who handles managing the money and paying the bills. But, except maybe a one-week in high school on how to budget, no one had taught me anything about how to manage a household (or personal) budget. I didn’t know how to plan for long-term or short-term goals, or how to prepare for quarterly bills. I paid everything as it came in, but it all always felt like a big mess. Then last year, I was talking to myself, and I said, “Self, you can do better than this.” So I decided to look into a budgeting program that I had heard a few friends talk about. I decided I would really put some intention into trying to learn it and make it work for 6 months. By month 3, I was hooked. I didn’t feel like such a mess anymore. I was able to plan for some big goals that we had for the year. I was also able to plan for and see where every dollar we earned was spent. I am no longer a scrap paper and pen user for my budgeting; I am a YNAB user for life. YNAB stands for You Need A Budget, and they’re not wrong. Having a budget doesn’t mean you can’t spend any money; it means you decide how and where your money is spent. YNAB is a subscription that costs less than a trip to your favorite fast food joint, but to say it’s saved me hundreds of dollars in haphazard spending over the year is not an understatement. Even better, if you use my code, you will get a month free! (and so will I for sharing the good news). This is also a great option if you have a college student you’re trying to teach to budget. YNAB is free for all college students!

Thanks for letting me share what works for our family and my blog for planning, meals, and budgeting. I know what works for me might not work for you. But I know that I’ve appreciated great recommendations from friends about what they have tried and where they have found success. I’ve also rounded up a few of my favorite office and planning supplies if you’re looking for physical items. 

Please share with me! What planning and processes are your tried and true that have been successful for you? I’d love to find a good plan and workflow for keeping my home clean and tidy.

Read More
Chris VanderWeide Chris VanderWeide

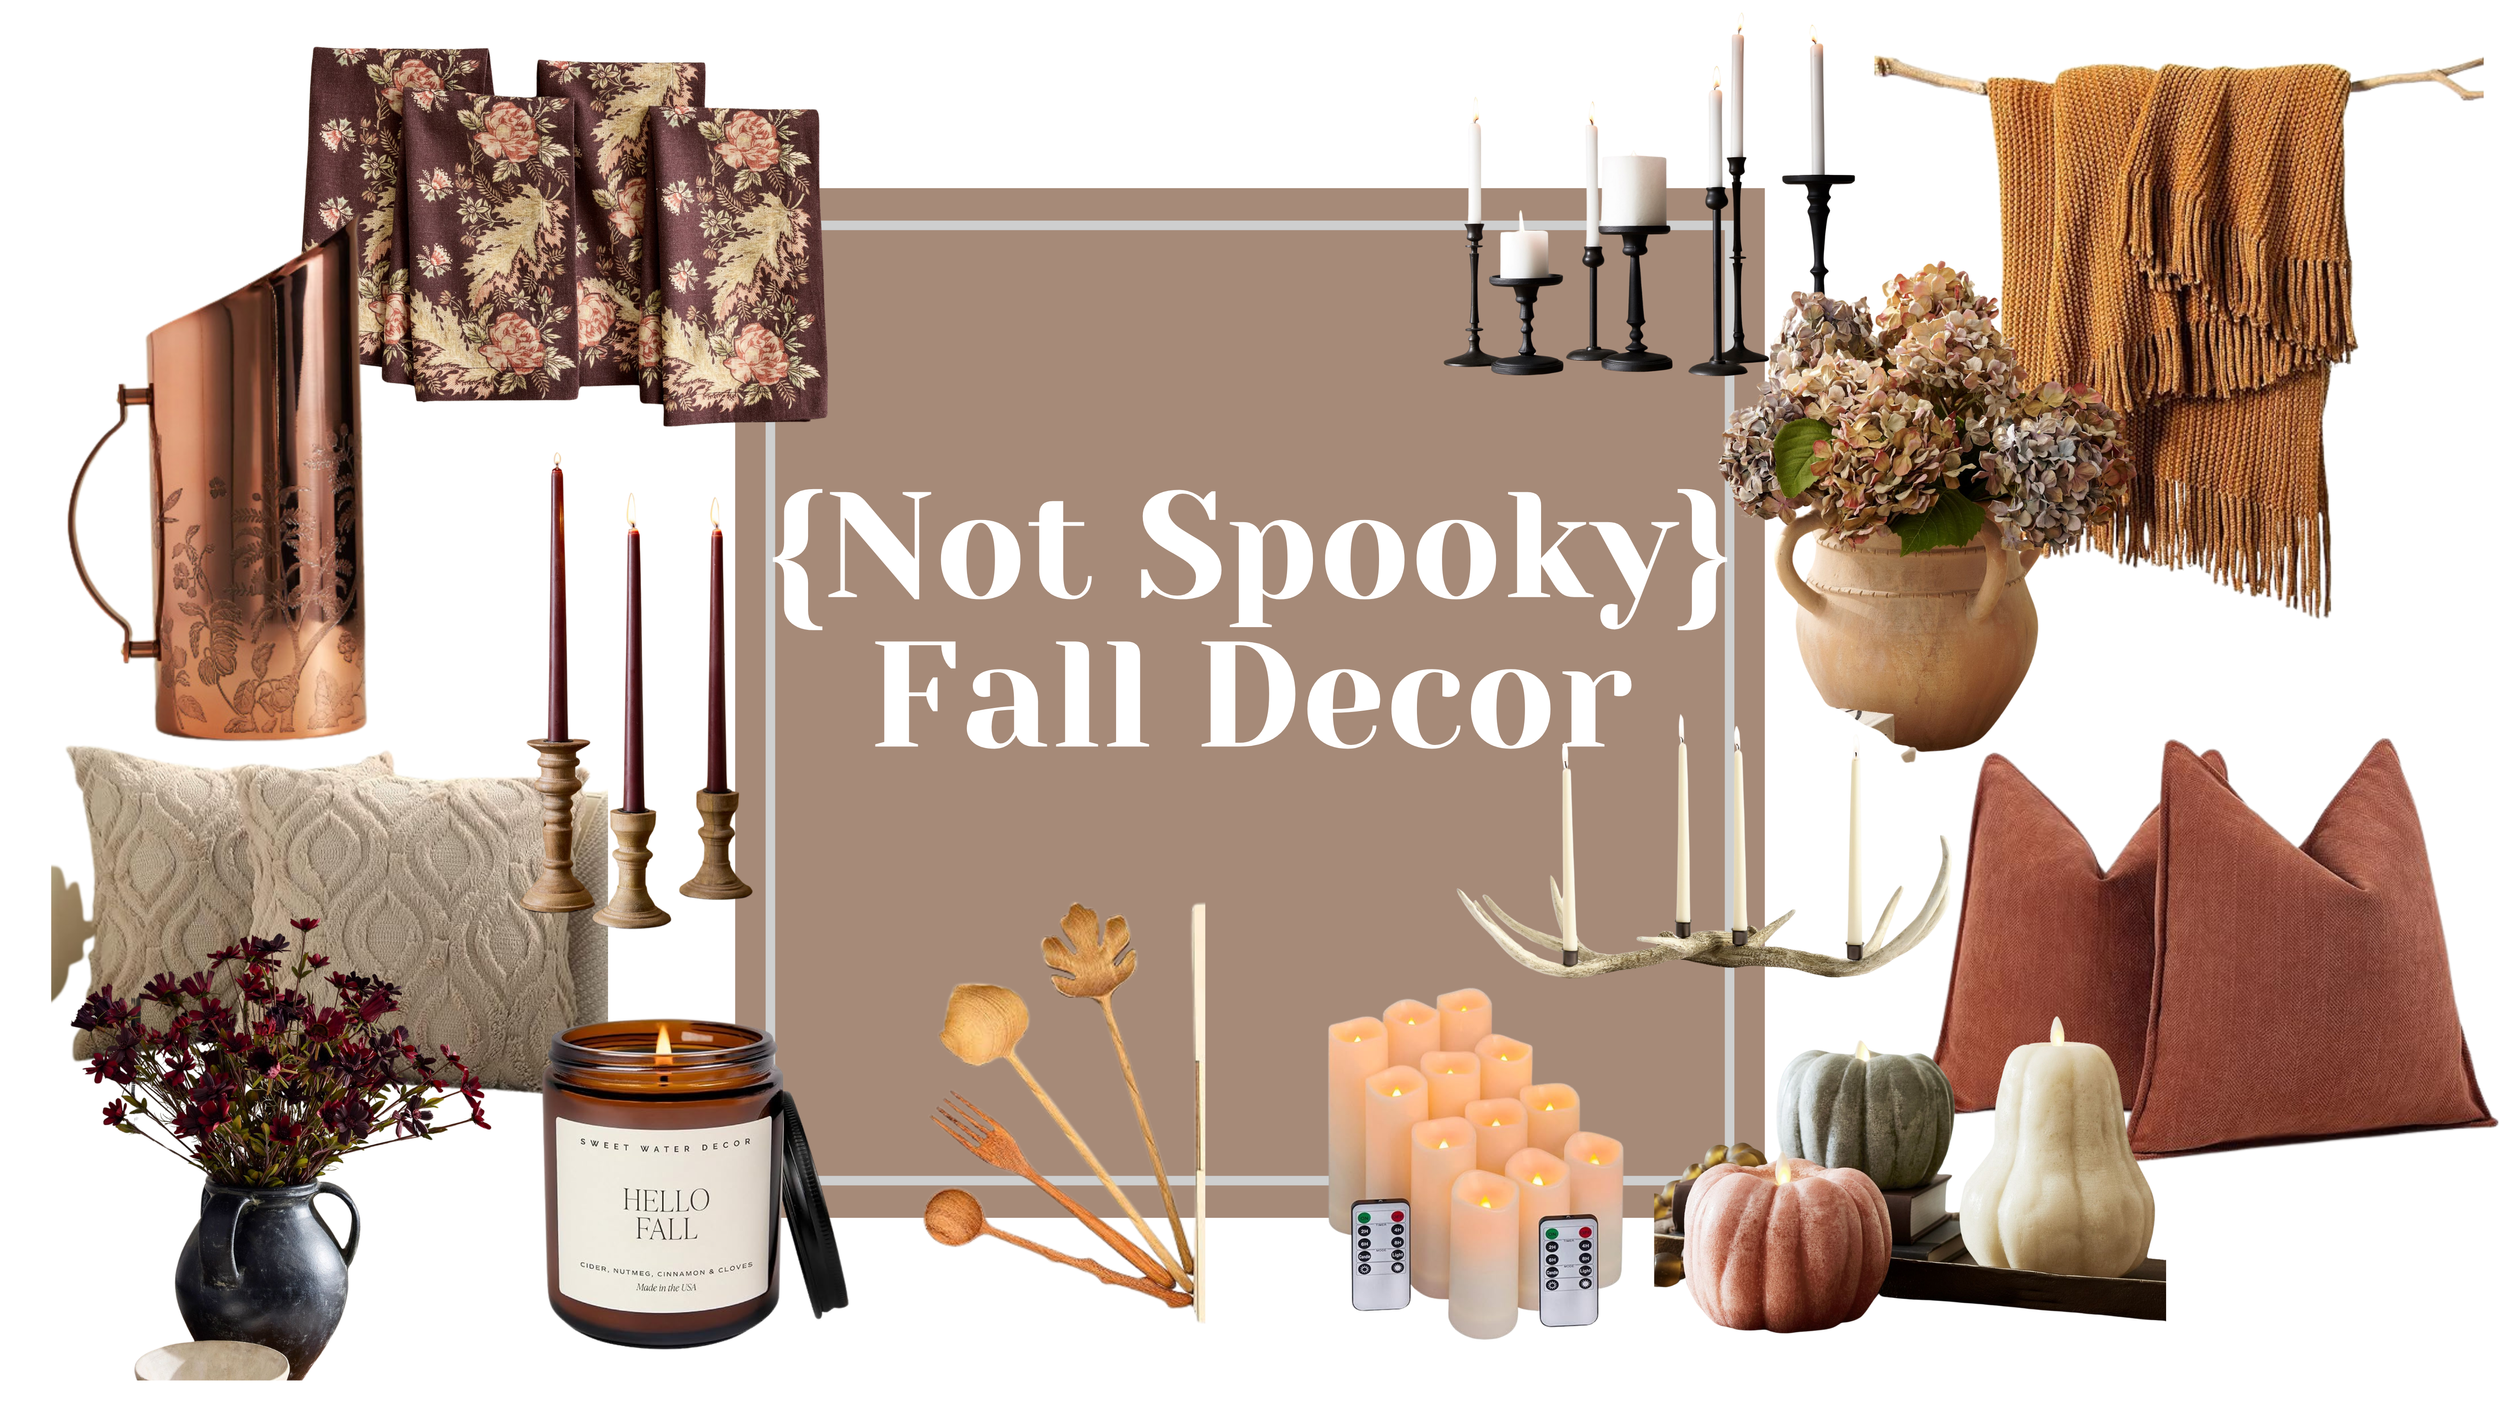
{Not Spooky} Fall Decor

I love decorating for the season, but I have to say, I’m not a big fall of spooky decor of Halloween and fall time. Give me all the amber bottles, rust color blankets, dried stems, and cozy scents and I’m in my happy place. I’ve been browsing some of my favorite shops to see what unique fall decor items I could find this year.

I love decorating for the season, but I have to say, I’m not a big fan of the spooky decor of Halloween and fall time. Give me all the amber bottles, rust color blankets, dried stems, and cozy scents, and I’m in my happy place. I’ve been browsing some of my favorite shops to see what unique fall decor items I could find this year.

I’m beyond excited about some of these one-of-a-kind items I found. From a copper pitcher and burgundy floral napkins. I love the timeless feeling of some of these items. 

Keep checking back because I’ll continue to add fall items over the following weeks. And let me know what your favorite items are!

Read More
Chris VanderWeide Chris VanderWeide

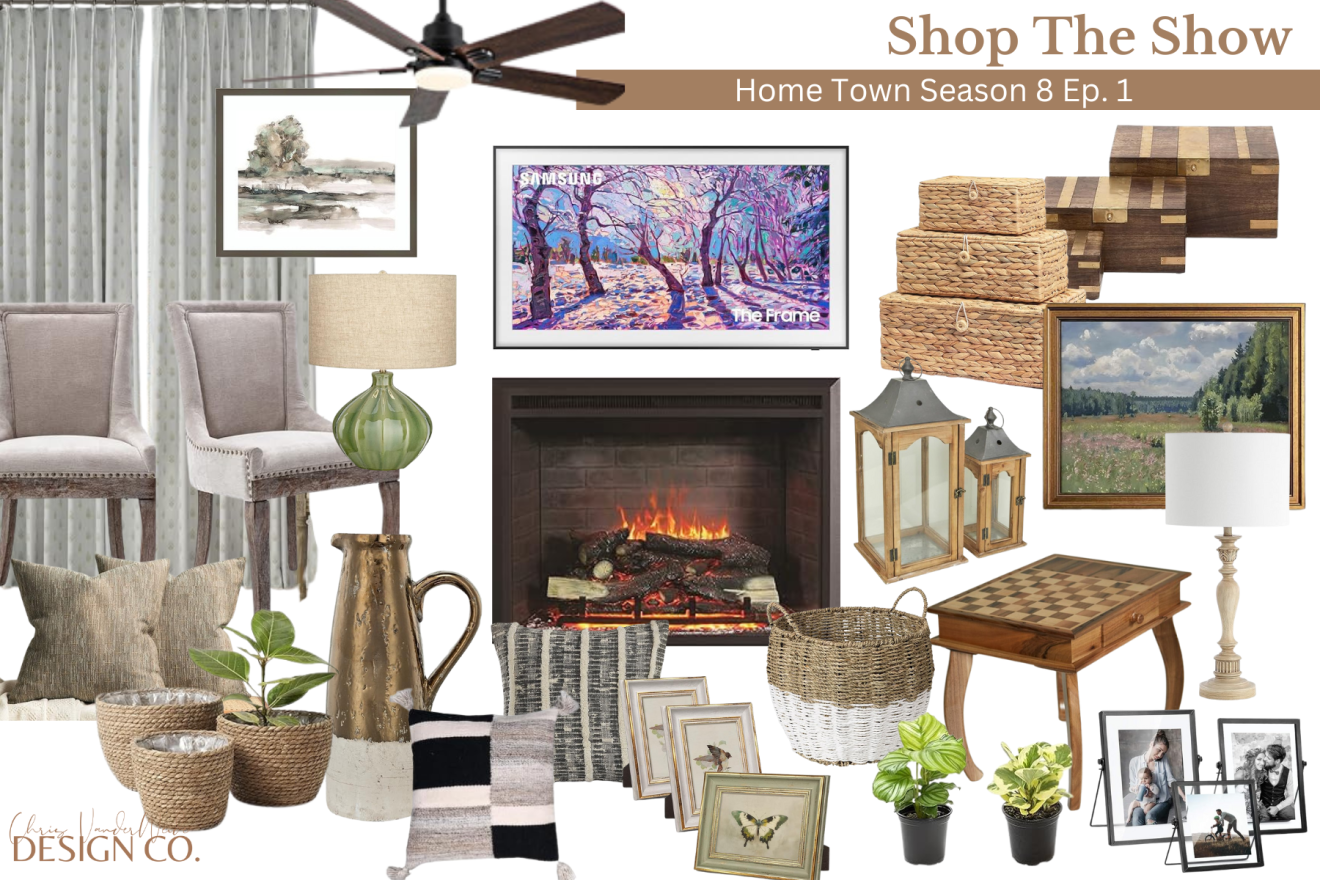
Shop The Show – Home Town Season 8 Ep. 1

Have you ever watched a show and thought, “Where did they buy that?” I love watching my favorite home remodeling shows and studying all the detail they put into each room. From the tile, to the lights, furniture, and all the decor items. I love how they pull it all together to create a beautiful story. And sometimes I think, “I’d love to recreate that look in my home”.

Have you ever watched a show and thought, “Where did they buy that?” I love watching my favorite home remodeling shows and studying all the details they put into each room. From the tile to the lights, furniture, and all the decor items. I love how they pull it all together to create a beautiful story. And sometimes I think, “I’d love to recreate that look in my home”.

So I decided to dig into an episode of Home Town and see if I could search the interwebs and recreate the look of the finished home. Let’s see how many look-alike items we can find in the completed dining room, living room, kitchen, and porch.

This was a fun episode because this family of 5 was moving all the way from Canada to Mississippi because they wanted more sunshine and opportunity for outdoor adventures. They ended up choosing a beautiful home tucked into the trees on a wooded lot.

The home they chose went from a rundown rustic forgotten abode in the woods to a cozy wood clad retreat. It was a pretty basic home inside with no distinguishing features, other than an outdated kitchen and a hole in the ceiling.

 The finished kitchen had beautiful floor-to-ceiling cupboards. The uppers are an off white, and the lowers are a calming pale green. With classic brass fixtures throughout the kitchen it makes the kitchen feel warm and polished. There are also hints of black and plants sprinkled around the room to bring more life and contrast to the space. 

The dinning room was a pretty blank space with lots of potential. The goal was to cozy up the space and create the perfect atmosphere for family and friends to gather. 

The final dining room has lots of layers and texture. The bookcases were actually taken from the living room and given a new coat of paint. They added contrast to the room and also grounded the space and gave it a focal point. The table, chairs, and dishes on the table are pretty neutral, but that gave way to fun pops of color and handmade dishes to be showcased on the new bookcases.

The living room started off with large bookcases covering a full wall, and a brick wall that used to house a wood-burning stove that had been removed. The new focal point of the living room is now a stunning shelving unit that includes an electric fireplace. With lots of seating and tables, this is a great room for gathering with family and friends, and lots of laughter. The layers of roman shades and curtains bring warmth and texture to the room, inviting you to grab your favorite book and cup of coffee and make yourself at home.

Keep scrolling for the links to each of the items I found throughout each of these rooms. And let me know what you think below. Did you love this Shop The Show post? This might be the most researched post I’ve ever written, but it was actually so much fun. Let me know your favorite home remodel show and what episode you want to see me source next. 

Read More
Chris VanderWeide Chris VanderWeide

A Simple Stool Upgrade

Last week, I found this incredible old stool at the Goodwill Outlet. I think it was a camping stool or something of that sort. But the fabric was so old and brittle, it was already all torn up when I found it. I’m trying to be more intentional with my thrift shopping. Because I’m always preaching to have a plan for your space before you start shopping, and I think that should apply to any thrift shopping I do as well. It’s so easy to get caught up in all the cute vintage items I find. But if I don’t know how I would use something or where I would use it, that should give me reason to pause and really think before I purchase.

Last week, I found this incredible old stool at the Goodwill Outlet. I think it was a camping stool or something of that sort. But the fabric was so old and brittle, it was already all torn up when I found it. I’m trying to be more intentional with my thrift shopping. Because I’m always preaching to have a plan for your space before you start shopping, and I think that should apply to any thrift shopping I do as well. It’s so easy to get caught up in all the cute vintage items I find. But if I don’t know how I would use something or where I would use it, that should give me reason to pause and really think before I purchase.

So when this cute stool caught my eye, I snagged it right away because anything you don’t grab right away when you’re thrifting might be gone the second you turn your back. But I knew I had to have a plan for how I would use it before I could finalize my decision to buy it. I also knew that I was going to have to put new fabric on it, but that gave me some flexibility in where I might use it. I wasn’t planning on using it to sit on, however, I did think it could be an ideal spot to set something… but what?

Then I had the thought that it could be perfect in our shower! Our shower is pretty large, and there is a small corner that I could set so that it wouldn’t get too wet. I had tried other things in that space before, but they were just too big. I had been looking for something we could set towels on. Our cabinet that holds all our towels is just outside the shower, but if we don’t grab a towel before we hop in, it makes quite a mess on the floor. So having a small stool to set a couple of towels would be a great solution, and this vintage cutie would do just the trick. 

I think it turned out so cute and could see us using this in multiple places around our home. It could work as a place to set some books, a plant, or even a little tray with drinks out by the pool. The fabric is so classic and fits almost anywhere in our home. 

I had some fabric that I had picked up on a past thrift trip that I thought would be perfect for this project. It’s a creamy white upholstery fabric with a thick blue stripe. So I did some quick eye measuring for how wide I wanted the stool to sit. Then I cut down the fabric. This was a simple project; all I needed was fabric and a staple gun. I just folded the ends of the fabric under, wrapped them around the top of the stool, and stapled them. This whole project probably took me less than 15 minutes. 

I’ve rounded up a few similar stools if you wanted to get the same look for your home. This is even a great option for pulling up another seat for a friend or toddler! I’m so glad I had the idea to use this stool in our shower; it really has come in handy, and we both like that it’s so much easier to grab a towel now.

Read More
Chris VanderWeide Chris VanderWeide

Weekly Thrift Finds

I was recently reading about the great debate of what’s considered thrift shopping and what’s not. Some people use the term thrift shopping in place of antique, consignment, or estate shopping. Each of these terms refers to buying pre-owned items. But if you’re curious where I stand on this great debate, I say that I only consider shopping at an actual thrift store like Goodwill, Salvation Army, or a thrift store supporting a local business, actually thrift shopping. Thrift stores have a lower price point and offer a wide range of things for your home. Items don’t have to be vintage, just something pre-owned (typically). They are almost always donated items for the purpose of reselling to support a local mission or business that supports the community. Now that we’ve settled that, let’s see what I picked up on my thrifting trips this past weekend!

I was recently reading about the great debate of what’s considered thrift shopping and what’s not. Some people use the term thrift shopping in place of antique, consignment, or estate shopping. Each of these terms refers to buying pre-owned items. But if you’re curious where I stand on this great debate, I say that I only consider shopping at an actual thrift store like Goodwill, Salvation Army, or a thrift store supporting a local business, actually thrift shopping. Thrift stores have a lower price point and offer a wide range of things for your home. Items don’t have to be vintage, just something pre-owned (typically). They are almost always donated items for the purpose of reselling to support a local mission or business that supports the community. Now that we’ve settled that, let’s see what I picked up on my thrifting trips this past weekend!

I stopped by three different stores, two that I frequent regularly and one that was new for me. The new one was one that a friend introduced me to. I’m actually not sure if this falls into the category of a thrift store. It’s actually a cute little shop that a sweet grandma and grandpa had transformed their home into a whole shopping experience. Their backyard is filled with little buildings that each have a theme and are filled with treasures to explore and purchase. Their porch and the main floor of their home are open to shop and explore. They are a mix of new and used items. Because of their price point, I would consider this a thrift shop. 

I found a beautiful vintage floral print in a gold frame. I don’t think I will ever have too many botanical prints. I also snagged a little crock with a cute blue butterfly on the front. This would look darling in my kitchen. The treasure I was most excited about was a set of 4 mini coffee cups with the names of different herbs around the top and images of each one pictured around the whole cup. I thought these would be darling with herbs planted in each one (or maybe some faux ones, because as hard as I try, I just do not have a green thumb). I almost forgot! I also found a beautiful children's Noah’s Ark book. The artwork in this book was absolutely stunning. I thought it would make a perfect coffee table book.

The total for this shopping trip was

Floral print in frame – $12

Butterfly crock – $5

Set of 4 herb mugs – $4

Noah’s Ark book – $1

A quick stop at the Goodwill Outlet did not disappoint. I like to stop in quickly at least once a week because they always have furniture for insanely low prices. I don’t find furniture every time I stop in, but I’ve gotten some really great items. On this trip, I actually found a Christmas tree! It’s about 4 ft tall with long needles and large pine cones on it. I’m excited to stash this until Christmas; the thought of having a few smaller trees tucked in different rooms of our home sounds so cozy. I found a small free-standing plate rack that I thought would be a great setting on my table or counter for holding extra plates. If you haven’t experienced the Goodwill Outlet, you are missing out. If you’ve never heard of it, I talked about it in a previous post. You find equal amounts of trash and treasures. While I was digging around in the bins, I found a broken stool with a ripped top. It was completely unusable, but I was pretty sure I had just the right fabric at home to totally transform it. 

The total for this shopping trip was

Christmas tree $4

Old stool $2

Plate rack $1

My last shopping trip was to my favorite thrift store. I seldom walk out of there empty-handed. This time, I was on a specific mission. I’ve been intentionally looking for realistic-looking faux flowers. I’m not great with indoor plants, and quite honestly, I’m almost ready to give the few I do have to my mom. Watering them is not top of my priority list, so I often forget to water them. I’ve been trying to add hints of green and (faux) life to our home, and in this season of life, faux plants are just best for me. I was able to find so many great artificial stems this time. Some were sold and alone, and a few were in small bundles. I was able to get them for a fraction of the price I would have paid for them if they had been new. Here’s a tip if you want to incorporate some faux stems in your home, whether you’re buying new or preloved. Look for flowers and leaves that are a more muted shade. Steer clear of anything that looks neon or too vibrant. The brighter the color, the more it looks fake. 

Total for this shopping trip

A ton of faux stems $15

I’d love to hear what your most recent thrift store finds are! What gem have you uncovered lately, digging through the piles of donated items at your local thrift store?

Read More